WYSIWYG Editor
Many of the madCMS administration screens have a simplified "what-you-see-is-what-you-get" (WYSIWYG) editor enabled on text entry fields. This allows you to do basic formatting of the text you enter in (eg: bold, italics, bullet lists, numbered lists) and a couple of more advanced things such as inserting hyperlinks and images.
If you are familiar with coding HTML, you can also view and edit the raw HTML within the text area.
Text areas able to be edited with the WYSIWYG editor will have the WYSIWYG menu bar displaying at the top of the text area.

Adding Hyperlinks
Adding a hyperlink to your content allows you to link from that content to another page or file.
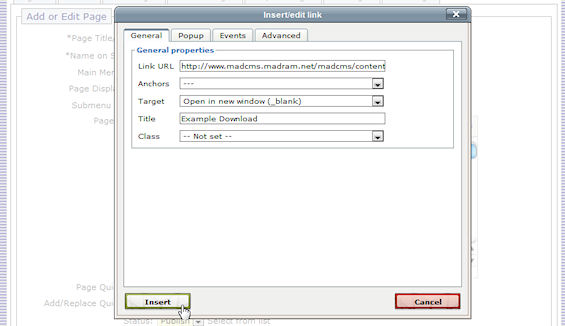
To create a hyperlink, first highlight the text you want to make into a link with your mouse, then click on the hyperlink symbol (the chain) on the WYSIWYG menu bar.

A popup window will appear, allowing you to insert the link. The link URL can be absolute (eg: http://www.somesite.com) or relative (eg:pageDisplay.php?module=page&pid=15).

The tabs on the Insert/edit link screen allow you to set various actions when a user clicks on the hyperlink, such as opening the link in a new browser. You can even have a javascript window popup.
Once you have inserted a hyperlink, you can edit it by clicking on the link symbol again, or delete the hyperlink by clicking on the "unlink" symbol (the broken chain).
Adding, editing and deleting Images
Before you use the WYSIWYG editor to make an image display in your Page, you first have to upload the image to your website. [How to upload images as files...]
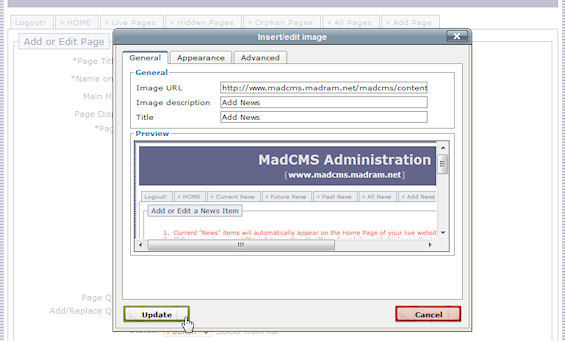
Click on the "add image" symbol (the little tree) on the WYSIWYG menu bar. An "insert/edit image" box will popup. Insert the URL of the image you wish to be appear in your Page.

You can over-ride the site stylesheet for images by clicking on the editor's "Appearance" and "Advanced" tabs. It is recomended,however, that you rarely resort to this - where possible, the site stylesheet should be left to control the look-and-feel of your site.
Once an image is inserted, you can edit the settings at a later date by clicking on the image, then clicking on the "add image" symbol (the little treee) again.
To delete an image from the page, simply click on the image and hit the "delete" key on your keyboard. Note that this hasn't actually deleted the image file from the system - you will need to do that through the "Files" menu.
Adding of editing HTML
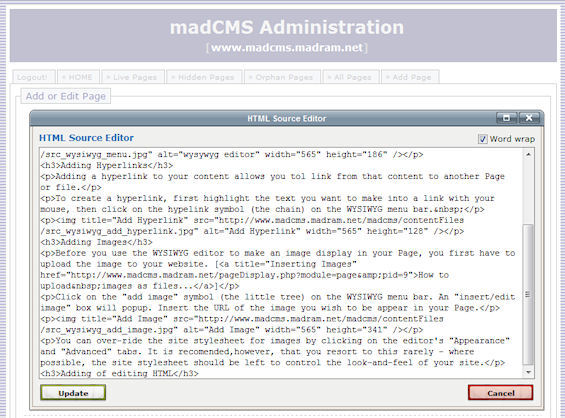
Advanced users may wish to add or edit the raw HTML code on the pages. Simply click on the HTML symbol on the WYSIWYG menu bar and a pop-up window will display the code.

After you have inserted or editied the HTML, click on the "Update" button to save the code. Don't foget to also click on the "Update details of Page" to save the changes to your webpage.
Caution: Neither the WYSIWYG editor or madCMS does any HTML validation. If you put in bad HTML (or any other code) the system will quite happily save it and try to display it on your live website. Don't blame it for your poor coding :).
 About
About User Manual
